Merry Christmas Sign ...... 2.0
If you look at pictures and videos from 2012 on back, you will see the Merry Christmas sign up on our roof. This was my pride and joy of the display. I had always dreamed of this sign since I first started decorating. On Christmas Day 2012, a reported wind gust of 75MPH took the sign off the roof and deposited it into the yard. The frame was broken, and even though no one was hurt it really scared Sandra and myself to the point that we decided that the sign could no longer live on the roof. It didnt take long to decide that the sign was a major part of our display and we had to resurect it. So with a lot of thought we decided to create Merry Christmas Sign 2.0. We can rebuild it. better... faster.. color changing... Pixels... Here is what we came up with.
(NOTE: I will be adding to this How-To as I go along. At this point it is not a finished project so keep watching to see the progress and development..... Bob)
(NOTE: I will be adding to this How-To as I go along. At this point it is not a finished project so keep watching to see the progress and development..... Bob)
Decisions, Decisions, Decisions!!
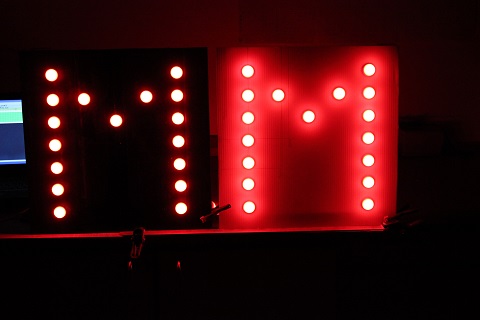
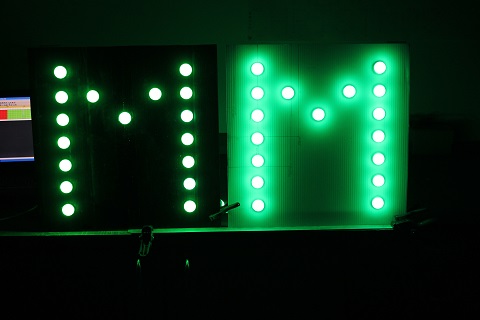
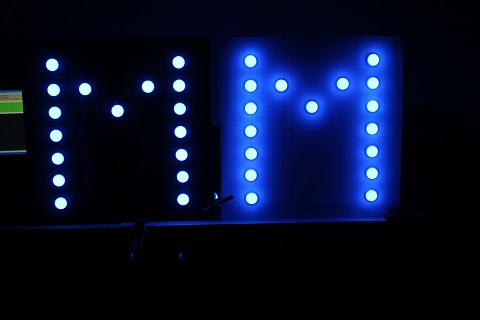
You may have seen this series of pictures in the blog. We had a decision to make regarding the coro and we wanted to see what these new 30mm pixels were going to look like. We made a couple of throw down coro letters and mounted the pixels (Which is actually just pushing them through the holes.) and set up a little test. Everyone we showed the demo to and everyone that saw the pictures said they liked the one on the left better. The two panels were made from a piece of white coro (right) and a piece of black coro (left). So.. black coro it is. I had David Moore over at HolidayCoro cut the 18" black coro squares. He did an exact job (they are square) and he really gave what I thought was a good price. I could have done it here, but having to go and buy the sheets, square them up and cut them out... David really made a deal I couldnt pass up.
|
|
|
Lets Get Started
Our first step in creating the Merry Christmas sign 2.0 was layout and drill the letters. Below is a how we created the panels that will be mounted to the frame then filled with 30mm pixels.
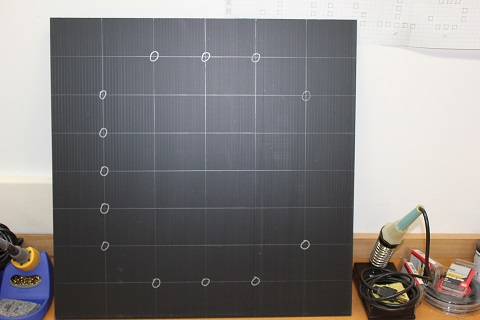
Each of the letter panels in the sign are 18" square. I laid out 5x7 grid (3" x 2.25"). Then used a Sharpie to circle the intersections I needed to drill to create the letters.
|
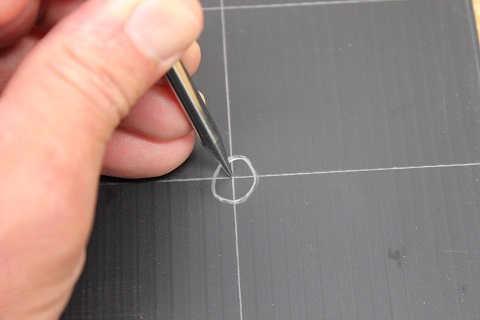
Here I just used an awl to punch the center. I did this as an alignment point for the tip of the Fostner bit I was going to use.
|

The letter "C" punched and ready to drill. We are using 30mm pixels for each dot. You will see later that I am punching a drilling from the back side. This means that certain letters will have to be laid out in backwards. Like the "R" and the "S" for example.
|
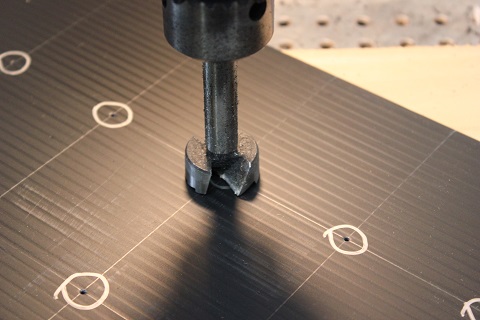
Here we are drilling the holes for each pixel. The drill press is stopped for this picture. The Fostner bit has a center that you line up in the hole you punched. I am running pretty high speed on the press to reduce tear out and burning.
|
The first row letters. Almost complete but not quite. I found the throat of my drill press wasn't deep enough to get the center pixel. The "E", "R" and "Y" will have to be drilled by hand.
|

This panel shows that I reversed the letter "R" and the center hole is not drilled. I reversed the letter so the layout lines would be to the back and not seen. However, you can clean up the lines but ... well .. I just didnt wanna...
|

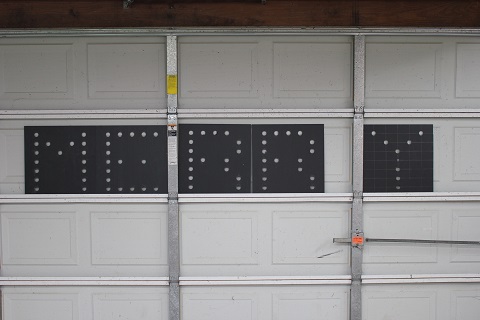
Here are all the letters drilled and ready to go.
|

Laid out on the floor. This is basically how they will mounted in the frame that we are making.
|
THE SIGN FRAME
The wooden frame that made the sign for the roof was pretty torn up after getting slammed to the ground. Merry Christmas Sign 2.0 is being built with a little more rigidity. Sandra and I decided that the frame should sit on the ground ( Actually a Sandra mandate!! ). So after some thought we came up with a billboard(ish) design made out of 3/4" square tubing. Now I can weld, but .. its been a LONG time and with the thin wall of the tubing, I thought it better to have someone that does it for a living do it for me.
As it turns out, there is a welding and fabrication shop here in town called Huntsville Steel and Fabrication. I have actually known the owners for years. So I dropped by with my scribbles and Todd knew exactly what I wanted to accomplish. He quoted me a price... sounded good .. so I left it with him. Here is what we came up with....
As it turns out, there is a welding and fabrication shop here in town called Huntsville Steel and Fabrication. I have actually known the owners for years. So I dropped by with my scribbles and Todd knew exactly what I wanted to accomplish. He quoted me a price... sounded good .. so I left it with him. Here is what we came up with....
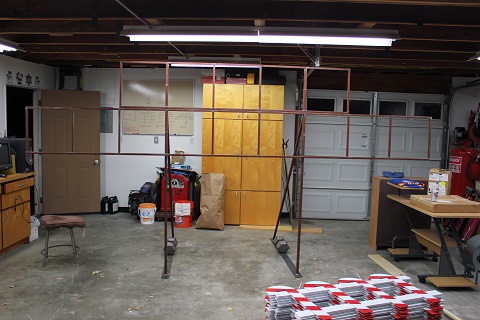
I drew up the basic design and Todd ran with the idea. Here is the completed frame. The letter boxes are 3/4" square primed tubing. The support frame is 1" square primed tubing and the feet are 3/8" x 3" plate with holes drilled for cane bolts
|
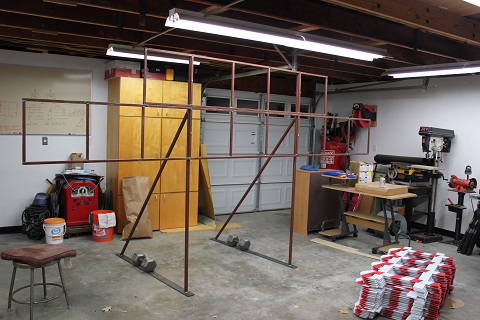
Just a different angle
|
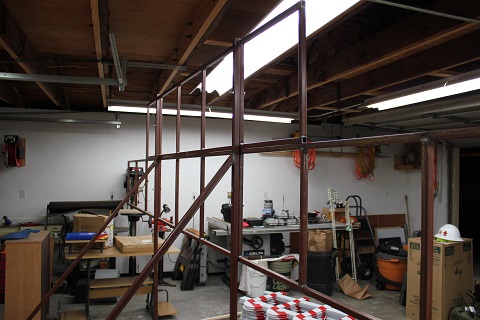
A different angle and from the backside.
|
I laid the top frame face down and drilled an 1/8" hole to accept a #8 pan head screw and washer to hold the coro panels in place. Here is the top section.
|
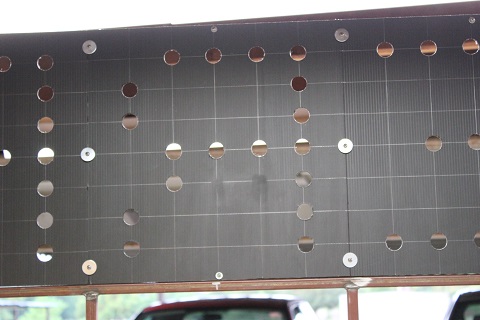
This is a view from the back. The 1/8" x 1" fender washer span the joints in the panels and hold them in place. In typical overkill fashion, I also have a screw top and bottom and along the edges.
|
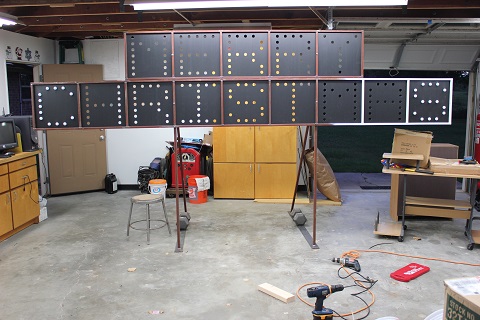
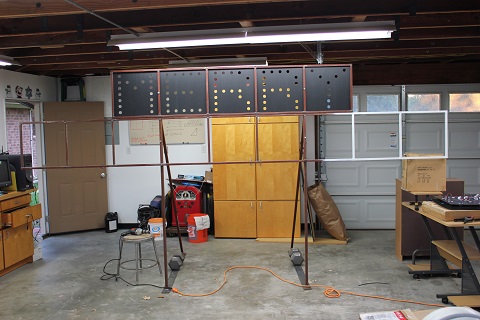
Here is the sign with all the panels installed. There is still some work to do on the back at this point (see previous picture). After this, it will be ready for paint.
|
THE FINAL DISPLAY
Once the frame was painted all that was left to do is insert the pixels, wire them up and make a something to hold the sign down. The fabricator drilled some large holes in the base plate and I simply took a 4' piece of rebar and bent it into a hook like a candy cane. I didnt have anything to heat it and bend it with so I did my best "Strongman" imitation and bent them by hand. They ARE IN THERE... We have had a couple of days of high winds but with the placement of the sign and depth of the cane bolts the sign is doing well. Since the controller is mounted to the back of the sign all it takes is one AC power cord and one CAT5 cable from the network switch and its up and running.
Once the frame was painted all that was left to do is insert the pixels, wire them up and make a something to hold the sign down. The fabricator drilled some large holes in the base plate and I simply took a 4' piece of rebar and bent it into a hook like a candy cane. I didnt have anything to heat it and bend it with so I did my best "Strongman" imitation and bent them by hand. They ARE IN THERE... We have had a couple of days of high winds but with the placement of the sign and depth of the cane bolts the sign is doing well. Since the controller is mounted to the back of the sign all it takes is one AC power cord and one CAT5 cable from the network switch and its up and running.
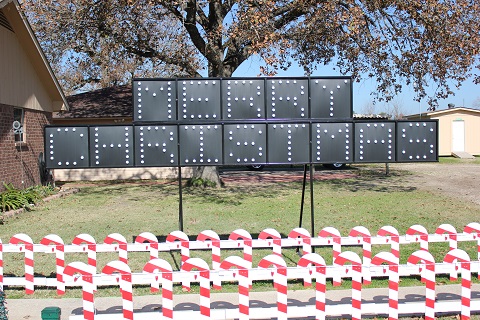
Here is the front of the sign as seen in the display. The frame was painted black to hide it at night during the show. Its worked out really well.
|
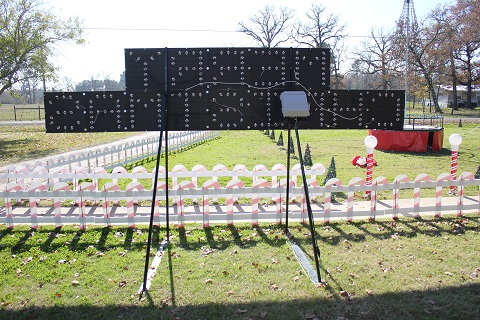
Here is a picture from the back. Youc an see all the wiring in place to connect all the pixels. There is the main input and 3 power injection points. With the exception of a few flakey pixels, the display has been rock solid.
|
