HolidayCoro Candy Canes Part 1
HOW WE DID IT
Make sure you watch David's video on building the candy cane. NOTE: The video shows you how to build the candy canes using the square dumb nodes. I will make a couple of suggestions here that I hope will help you out. I will center on using DMX control since DMX will give you the most bang for your buck as far as channels and cost. There are other ways to control the lights in this project.
1. If you use dumb nodes, you will need some type of controller, for example a HolidayCoro 3-channel DMX controller. What you will get is a candy cane that you can control with full color RGB (Red/Green/Blue) but every node (all 16) will always be the same colors. So you end up with a solid color, but segmented, candy cane. Nothing wrong with that if that is what you want!
2. You could add, for example, a second HolidayCoro 3-channel DMX controller and wire every other node to the corresponding controller. For example node 1,3,5,7,9,11,13,15 go to controller 1 and node 2,4,6,8,10,12,14,16 go to controller 2. This will allow you create a true candy cane effect such as a red/white, green.white,blue/white cane or any combination of striping that you can imagine.
3. The third idea is to use smart nodes or pixels. Pixels have a chip in them that allow you to address and control the RGB content of each pixel seperately. Explaining pixels is beyond this how-to and there are a lot of references to pixels all over the Christmas forums. See our LINKS page for references. The pixels give you unlimited control of how your candy cane(s) can be displayed. Your imagination is the limiting factor. This is the path that we chose for this project.
Before we get started, let me take a moment to explain a few things I did wrong. These types of pixels have a chip in them that allows you to address and program each module individually. Since we have 8 CoroCanes I needed to keep the pixel string intact from one cane to the next. Basically, in to cane 1, out of cane 1, in to cane 2, out of cane2..... out of cane 7 in to cane 8. This allows total control of all 128 pixels in the project. They can be accessed in ANY order at any time, meaning I can turn pixel 1, cane 1 on to red while turning pixel 16 in cane 8 to blue. LIMITLESS possibilities. You can chase vertically up each cane then have each cane chase to the next. You can chase horizontally ACROSS the canes (a sweeping motion of 1 to 16 pixels).. again, do you see the unlimited possibilites?
So where I messed up was I forgot to keep the sequential pixel chain alive from one cane to the next. You will see in the How-To photos how I solved the issue. You may be a pixel expert and wouldnt dream of making this mistake, but you may be a novice (like me) and not realize it right off the bat. So here is Part 1 of the How-To.
Also look for the test video at the end of this page. It will give you an idea of what the CoroCane looks like and VERY BASIC idea of what it can do when loaded up with pixels.
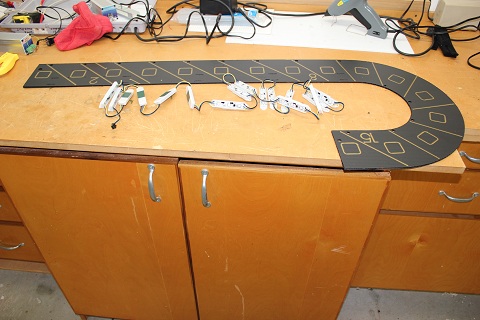
Here is shown the bottom of the corocane along with the 16 pixel modules that will be attached. The shapes are pre-cut and very simple to cut out.
|

Watch the HolidayCoro video and listen for David's explanation of using square vs. rectangular. We are using rectangular for better light dispersion.
|
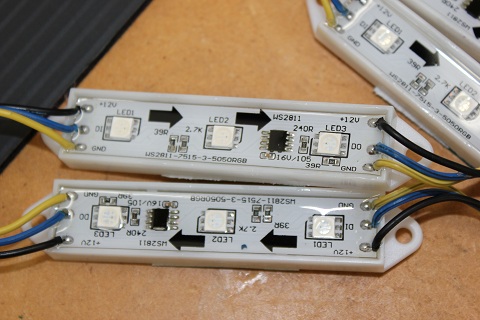
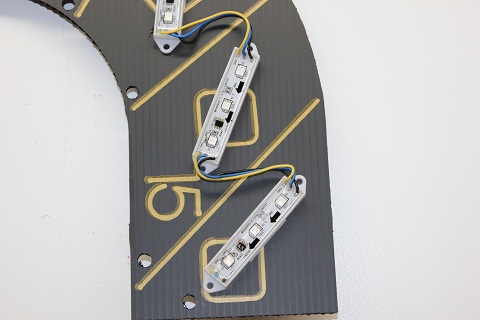
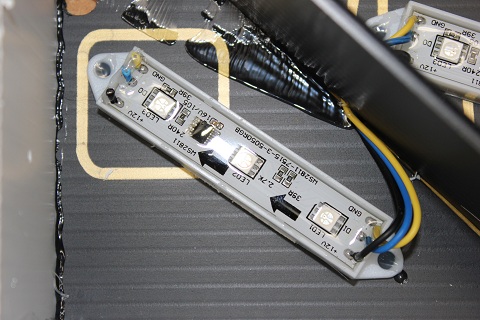
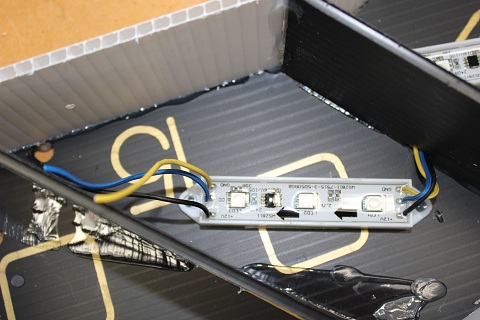
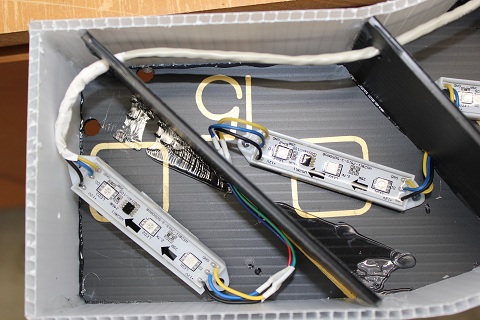
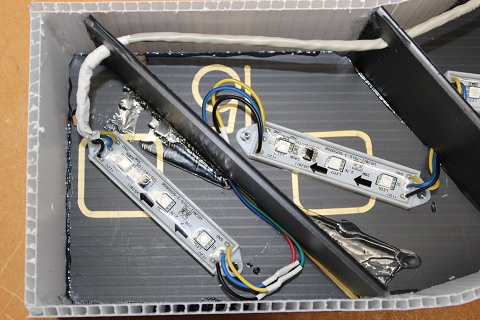
Notice when using pixels the signal orientation. Also note in this pixel set there are only 3 wires. +12vdc,D0, and ground. The D0 is the data signal. Watch later in this How-To on wiring these types of modules.
|
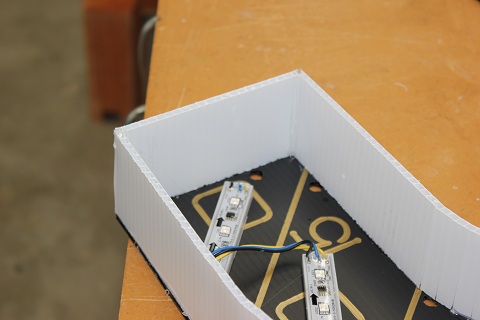
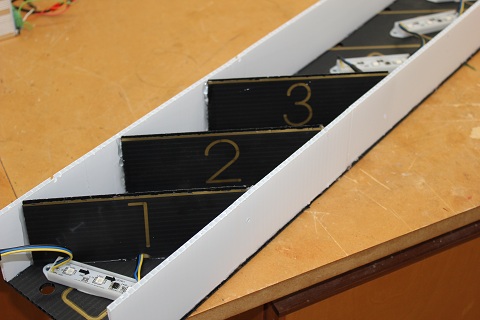
Here is a base with the rectangular pixels in place. These pixels had very strong double stick tape and we decided to use it. You can take it off and hot-glue your modules to the coro.
|
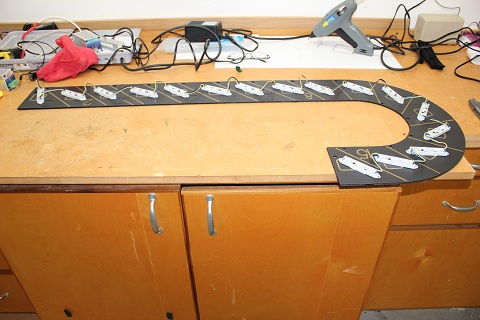
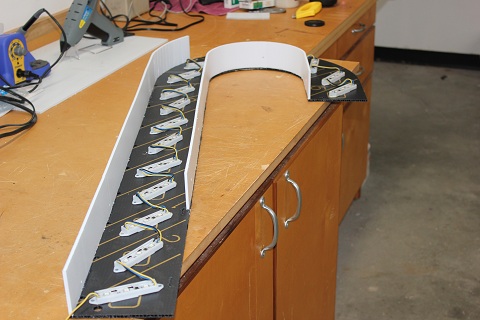
This was the best layout I could come up with. You have to consider the length of wire between each module. NOTE: This picture contains a BIG MISTAKE that I made and didnt realize until much later. I should NOT have trimmed the wires from pixel module 16. MORE ON THIS LATER!
|
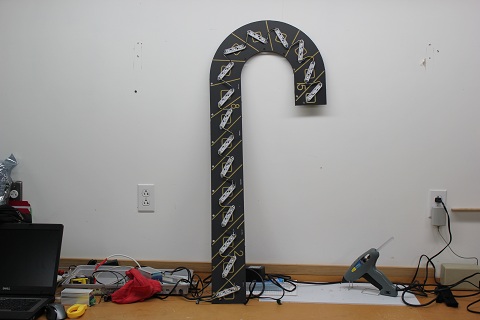
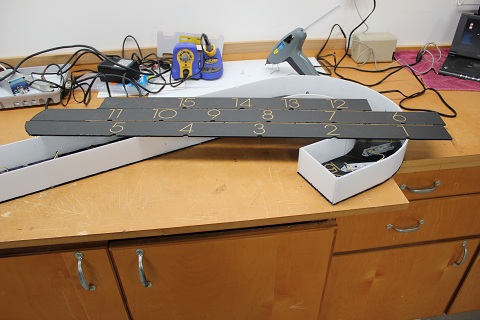
This give you a little reference as to size. Notice my full sized hot glue gun to the right and the open laptop on the left. The cane is 45" tall and 18.5" wide
|
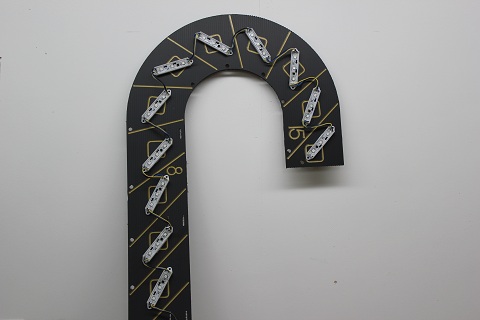
Notice the arrows on the modules. You will need to make sure you orient themodules correctly. Again, the mistake I made in cutting the wires from module 16. NOTE: The mistake ONLY applies to using pixels. If your using dumb nodes this will not be an issue. Read the text on connecting pixels.
|
This is the reason you want to TEST each module string BEFORE you glue it down. This module had an issue with the red LED. Green and blue where fine but no red on any of the 3 LED's. As you can see it is very easy to cut out the bad module and replace it.
|

I didnt have the proper size heat shrink tubing and it split when I shrunk it down. Not a problem.
|
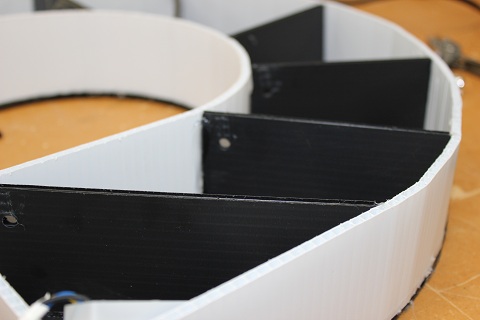
David shows in the video how to use the coro that the canes are shipped in to cut the strips needed for the sides. For the inside radius I cut every two flutes to make the curve. The outside radius I cut every other flute in the coro. It made it smoother.
|
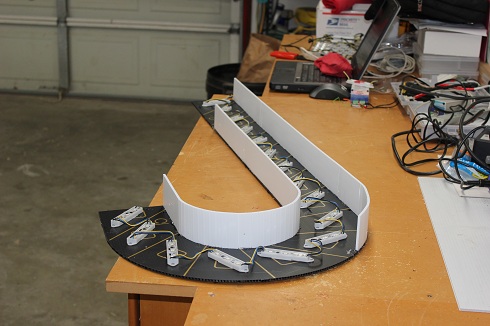
Notice how the sides are started. The inside radius is started from the end of the hook and brought down the cane. The outside radius starts at the bottom of the cane and moves towards the top of the hook.
|
I know this looks like a far leap in the sequence, but David's video covers this very well. One thing I did when joining the side pieces was to leave the side of one coro flute open then slip and glue the continuing piece in. This made for a good joint as you extend the sides.
|
Here I went ahead and cut out the dividers. David shows you how to cut them out. I took it one step further since I had 8 of them to do. I set up my table saw with a fine toothed plywood blade and my fence to cut out the dividers as shown.
|
Here I am using my CoroClaw (purchased from HolidayCoro and HIGHLY recommended!!!) to slit every other flute to make the curves. I did cut every flute on one of the sides and while it works its not needed and makes the strip flimsy and hard to work with.
|

If you enlarge the photo (click on it) you can see what i was talked about earlier about joining the two strips.This stip has been slitted and is ready to make the long curve.
|
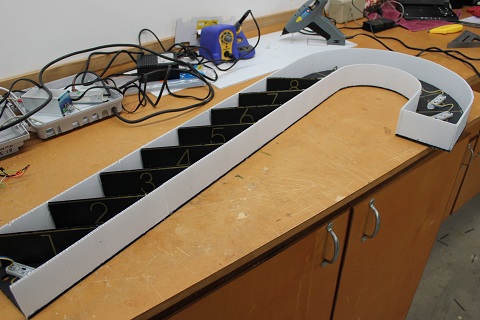
After you complete the curve you cut a piece of coro and close in the end of the cane. Once again, PLEASE NOTE, I still have not yet discovered my mistake with pixel 16.
|
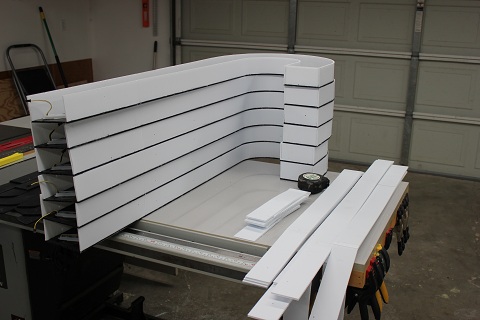
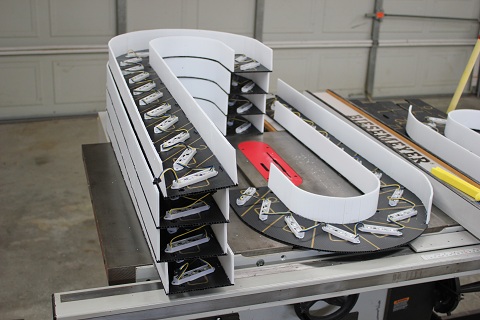
I completed 2 canes before I decided to take a mass production approach to the project. Here are the 6 remaining canes with the sides and hook end completed. I intentionally left the bottom open becasue I knew I was going to have to wire in the connectors when they arrived from China.
|
I've gathered a set of dividers. I will cut these out by hand according to David's video. Since they vary in size it was easier than trying to set up the saw, calculate blade kerf etc..
|
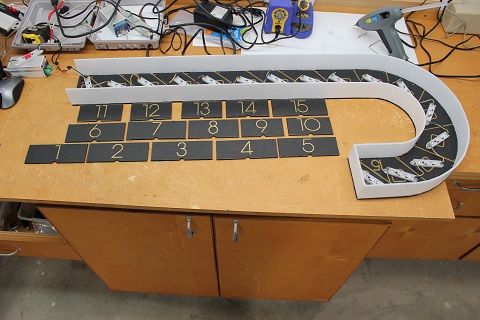
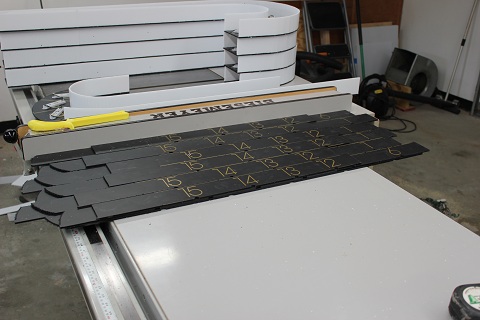
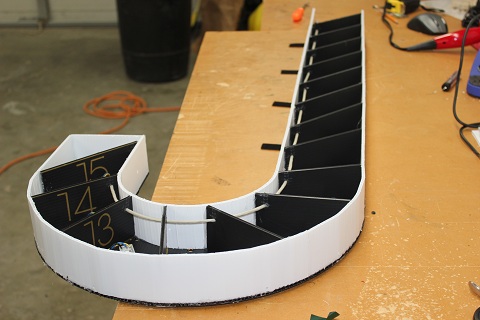
I have cut out all the dividers. Notice they differ is size. Also note they are numbered which matches up to the printing on the base. 1 to 1, 2 to 2 etc. Before you start gluing them in, take a moment to trim them up to match the marks on the base. I had the height already set becasue I used my saw to cut them all out.
|
As David suggested, I place the numbered side facing the compartment number. I had a single temp hot glue gun so being patient is a plus. Run your bead on the edges and the bottom, wait a few seconds then set and hold them in place. You can run a WETTED finger along the joint to smooth the joint and to help cool the glue. CAUTION!!! Hot Glue will STICK AND BURN and HURTS VERY MUCH !!! Please be carefull.
|
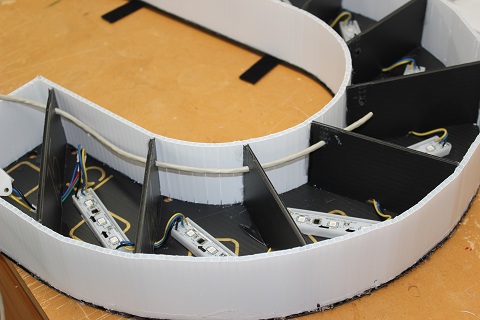
Just continue laying in your dividers up the cane. Note there is a half circle in the base of the divider. this allows the wires from one module to the next to pass through.
|
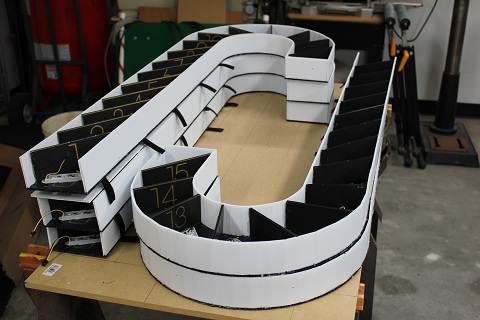
Here are the canes with all the dividers in place. Once you are at this point these flimsy pieces of Coro suddenly become VERY sturdy and strong. It will surprise you. Notice also I have added the velco strips for securing the canes to a pole when standing them up in the display. This is also covered in the video.
|
I now have 8 canes completed and suddenly realize I have REALLY messed this project up. Remember I talked about the arrows on the modules? (BRIGHT LIGHT GOES OFF IN MY HEAD!!) Opps. These modules need to be wired in SEQENTIAL order to control them. RATS..
|
So how do we fix this? Notice I cut off the leads in module 16 right at the module so there isnt any saving this one. So I had to take out module 16 leaving as much lead wire as I could.
|
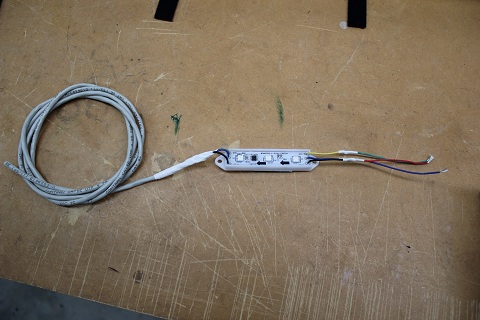
I then built this pixel harness to replace pixel 16. I extended the leads of the pixel to give me some room to work (big hands, small space..) and added enought CAT5 to the other end to get back to the bottom of the cane. IMPORTANT!!! Make sure of the direction of the arrows on your module when building you harness. This applies even if you do it right the first time and add the extension.
|

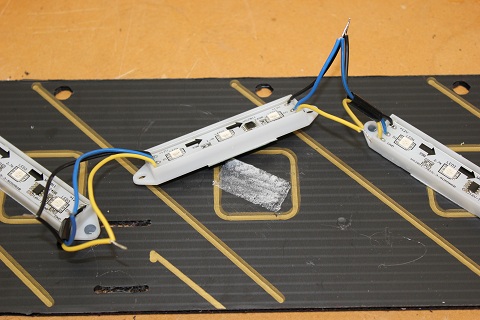
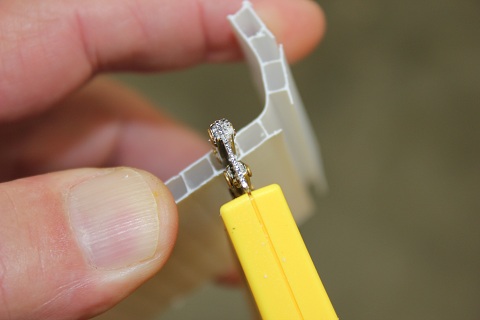
Here I am wiring in the module. Take care to look at what each wire is and DO NOT rely on wire color. In this case module +12 was black, D0 was blue and Gnd was yellow.
|

Here the module is wired in and pixel 16 is ready to be reattached to the coro base. I used heat shrink to cover the soldered joints.
|
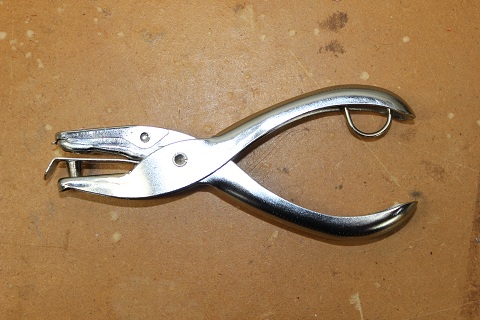
Now you have to decide how to get the CAT5 back to the bottom. You could try to sneek the cable past each of the pixel wires in the base of each divider, OR you could drop the wire our the drain hole in compartment 16 and poke hole and Tie-Wrap along the back of the cane OR, you could use a single hole puch, and create a new path inside the cane for the wire.
|
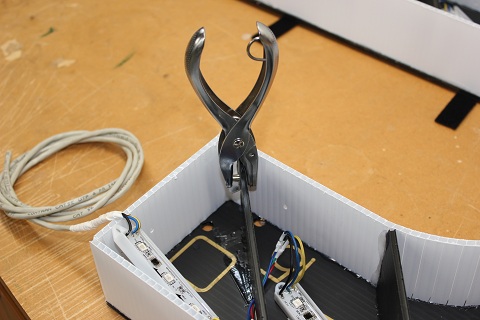
Here I used the hole puch to put a perfect hole in the coro for the wire. I slip the puch as deep as it would go, click and a perfect hole. You may need to rock the punch a little to clear the coro hole you punched but it will slip off without tearing up the dividier.
|
As you can see, I'm staying to the inside of the cane and holes are perfect in each one. Dont worry about EXACT depths, just push the punch down, the coro will compress and make the hole.
|

Here you can see I have carried the punched holes all the way to the bottom of the cane. Once again, this is ONE way to do it, However some method will be needed to get the signal wire back to the bottom of the cane.
|
Here I just start feeding the CAT5 through the holes starting at compartment 16. BTW, after doing this I tested with a top on the cane. The wire DID NOT cast a shadow that I could see.
|
The return cable is in place
|
The repaired module is now ready to reattach to the coro base.
|
The repair is complete. The module is set in place. I did add a dab of hot glue to each of the mounting holes in the module just in case extreme temp changes caused the double stick tape to let go.
|

Here is the completed cane ready to have the connectors wired in and the top put on.
|
In order to help this page load easier for everyone, this concludes PART 1 of the CoroCane buildup. At this point we are waiting for the 4-Pin waterproof connectors from China so the project is on hold. However, I'm sure everyone is excited to see what the CoroCane looks like when using pixels. I created a short little sequence using LOR SuperStar to give you a SMALL idea of what to expect.
Pixel Test from Bob Moody on Vimeo.

